No products
New products
-

Mini Sanding Block, Printed in White ABS
Doesn't come with sandpaper, photo is just to show it assembled. 3D...
2,89€
Kits
- Active components
- Antennas
- Bargain Packs
- Batteries
- Circuit Prototyping
- Component Selection Packs
- Computer Related
- Blank Media
- Computer PSU's
- Computers (Desktops / Towers)
- CPU's and coolers
- Docking Stations
- Flash Memory
- Graphics Cards
- Hard Disk Donor PCBs
- Hard Disk Spindle Motors
- Hard Disks (Generic)
- Hard Disks (Specific Models /Firmware)
- Input Devices
- Laptop Disk Caddies
- Laptop Display Panels
- Laptop Hinges
- Laptop Keyboards
- Laptop other Spare Parts
- Laptop Power Supplies / Adaptors
- Laptop Wifi cards / modules
- Laptops / Tablets
- Memory Modules
- Monitors
- Motherboard Back Plates
- Motherboards
- Network Cards
- Networking - Routers, Switches, Firewalls e.t.c.
- Other Cards
- Printer Ink (Mostly out of date)
- Removable (Floppy/Optical) Drives
- Sound Cards
- Webcams
- Consumer Products
- Craft Supplies
- Electromechanical
- Adaptors
- Circuit Breakers
- Connectors
- Banana
- Battery connectors / Holders
- Clamps, Croc Clips and Hooks
- Connector Pins
- Connector Shells
- Crimp Terminals
- D Type
- DIN Connectors
- Jack
- Other Connectors
- PCB Headers / IDC Connectors
- Pin extraction tools
- PSU Connectors
- RCA / Phono / Cinch
- RF Connectors
- RJ Connectors
- Screw/Clamp Terminals
- Speaker Connectors
- Test Pins
- USB
- XLR / Cannon
- Din Rail Stuff
- Fans
- Fuse Holders
- Loudspeakers / Sounders
- Mains Connectors / Switches e.t.c.
- Microphones
- Motors / Servos
- Panel Indicators
- Panel Meters
- Pumps
- Relays
- Switches
- Tape Heads
- Used Fans - Clearance
- Interesting Old Stock or Used Items/Modules
- Kits
- Labels / Paper Goods
- Measuring / Test Equipment
- Mechanical Hardware
- 3D Printed Items
- Bearings
- Brackets
- Cable Clips
- Cable ties
- Carabinas
- Compressed Air Fittings
- Cotter / Split Pins
- Drive Belts
- Enclosure Accessories (Handles, Protective corners e.t.c.)
- Enclosures / Boxes
- Eurorack / Subrack Parts
- Fan Guards
- Feet
- Grommets / Strain Reliefs
- Heatsinks
- Hose Clamps / Jubilee Clips
- Knobs
- Locks and accessories
- Magnets
- Nuts
- Other mechanical parts
- PCB Standoffs / Spacers / Pillars
- Pop Rivets
- Screws (Machine)
- Screws (Self Tapping and for Plastic)
- Springs
- Wall Plugs / Anchors / Rawplugs
- Washers
- Modules and Circuit Building Blocks
- Passive components
- Power Supplies
- Sensors
- Services
- Tools
- Wire and Cable
 View larger
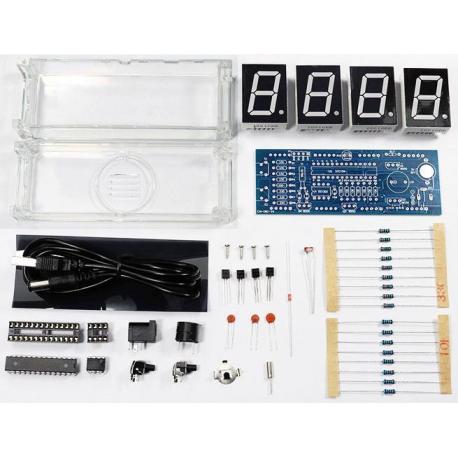
 LED digital clock Kit, 082V4, Red
KIT111
New product
1 Item
Warning: Last items in stock!
- Send to a friend
- Remove this product from my favorite's list.
- Add this product to my list of favorites.
More info
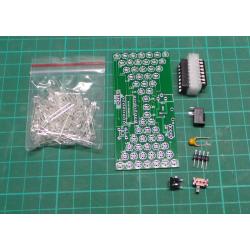
Digital LED clock Kit
Description:
24h mode,
Number height: 68mm,
Crystal controlled 32798Hz
Power supply: 5V/200mA
Backed up from a 3V battery in case of failure
Dimensions: 100x40x30mm.
Instructions:
Firstly, assemble all the components, solder them to the printed circuit board. Then check if you
they did not make a mistake, and only then solder the digit LED’s.
1: Solder the Resistors and Capacitors (lower profile parts first), Then the IC sockets and battery holder. Now the Switches.
2: Now the photoresistor, thermistor, and crystal oscillator.
3: Check that all components are installed and there was no error in the installation, whether the components are soldered correctly and whether there is a short circuit somewhere.
4: Install the Numerical LED’s, paying attention to the correct rotation of the numbers. Finally, insert the integrated circuits, The notch on the socket and the IC must point to marks with a notch on the printed circuit board. Insert the lithium battery and connect the 5V power supply
5: Reset: press two keys at the same time for five seconds, then 7:59 will be displayed. It will be displayed after five seconds
8:00 a.m., the reset is done and a buzzer sound will confirm it.
6: Setting the time, alarm clock and hourly chime
a: to set "hours", press the function button (the hour digit and the dot will flash), press + to set
required values
b: to set "minutes", press the function button (the minute digit and the dot will flash), press + to set
required values
c: to set the alarm clock, press the function button (the hour digit will flash, but the dot will not), press + to set the desired value
d: to set the alarm minute, press the function button (the minute number will flash, but the dot will not), press + to set the desired value
e: check if the alarm clock is on: press the function button again (all digits remain unchanged) if dot No. 4 lights up, it means that the alarm clock is on, if it is not lit, the alarm clock is off.
f: setting the time for the "hourly chime" – Press the function button (the hour digit flashes), set with the + button start time of the alarm (e.g. 9, then the alarm will start ringing every hour from 9:00) and press the function button again (now the minute digit flashes). Now set the final alarm time with the + button (if you set 23, the alarm will ring every hour from 9:00 a.m. to 11:00 p.m.)
g: check whether the clock chime function is on or not: Press the function button again (all digits
will remain unchanged), press the + key and if dot No. 3 lights up, the hourly chime is on. If you
does not light up, it is turned off.
h: press the function button again to end the setting.
7: Temperature correction, date and week settings
Press the "+" button, the temperature will be displayed. Press the function button to set the current temperature (according to external thermometer) and press the "+" button to confirm and adjust the temperature. Edit the date at the same time. Press the function button ("month" flashes), press the "+" button to adjust the month; press the function button again ("day" flashes), by pressing the button "+" edit the day and then press the function button to confirm the selection. Press the "+" button again (the week will be displayed), press the function key (the week flashes) and press the "+" key again to adjust the week, press the function key to it confirm and then press the "+" button to exit the menu.
8: Automatic display function:
45 second time display
5 second temperature display
5 second date display
5 second display of the week.
When it is dark, the backlight of the digits will automatically darken, and vice versa, in light, the intensity will be stronger.
9: Dark flexible membrane:- place it on the digits and trim as needed.
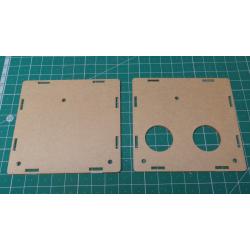
10: Fold the protective box and screw together with the included screws
Reviews
No customer reviews for the moment.
30 other products in the same category:


